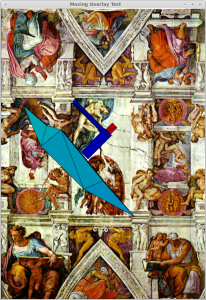
As mentioned in my last post the next step in my exploring is the creation of an animation. I could achieve this with the help of this blogpost.
The implementation was pretty straight forward using the aforementioned post. To create an animation you use a time line, and the define a single key frame with an event handler. The event handler then will do the update of the animation. My code does not use a binding yet as the needed binding would not be a simple integer but a list of sequences as well as positions. Further it seams that the API has changed slightly since the post was written, as there is no constructor of KeyFrame that would allow omitting KeyValues. (I’m using a beta build of Java 8 (b62), which includes JavaFX).

package javafxtest;

import java.io.File;
import java.io.FileInputStream;
import java.io.FileNotFoundException;
import java.util.ArrayList;
import java.util.List;
import java.util.Random;
import javafx.animation.KeyFrame;
import javafx.animation.KeyValue;
import javafx.animation.Timeline;
import javafx.application.Application;
import javafx.event.ActionEvent;
import javafx.event.EventHandler;
import javafx.scene.Scene;
import javafx.scene.canvas.Canvas;
import javafx.scene.canvas.GraphicsContext;
import javafx.scene.image.Image;
import javafx.scene.layout.StackPane;
import javafx.stage.Stage;
import javafx.util.Duration;

/**
 *
 * @author andi
 */
public class MovingOverlayTest extends Application {

    private Timeline timeLine;
    private List<Image> images;
    private Random rnd = new Random(System.nanoTime());

    @Override
    public void start(Stage stage) throws FileNotFoundException {
         StackPane root = new StackPane();
        File f = new File("/home/andi/Pictures/Adam.jpg");
        Image image = new Image(new FileInputStream(f));
        final double width = image.getWidth();
        final double height = image.getHeight();
        Canvas background = new Canvas(width, height);
        GraphicsContext context = background.getGraphicsContext2D();
        context.drawImage(image, 0, 0);

        root.getChildren().add(background);

        images = new ArrayList<>();
        images.add(new Image(new FileInputStream(new File("/home/andi/Pictures/kajak1.png"))));
        images.add(new Image(new FileInputStream(new File("/home/andi/Pictures/kajak2.png"))));
        images.add(new Image(new FileInputStream(new File("/home/andi/Pictures/kajak3.png"))));
        images.add(new Image(new FileInputStream(new File("/home/andi/Pictures/kajak4.png"))));
        images.add(new Image(new FileInputStream(new File("/home/andi/Pictures/kajak5.png"))));

        final int xRange = (int) (width - images.get(0).getWidth());
        final int yRange = (int) (height - images.get(0).getHeight());
        final Canvas animation = new Canvas(width, height);
        final GraphicsContext context2 = animation.getGraphicsContext2D();

        timeLine = new Timeline();
        timeLine.setCycleCount(Timeline.INDEFINITE);
        timeLine.getKeyFrames().add(
                new KeyFrame(Duration.millis(500),
                    new EventHandler<ActionEvent>() {

                        @Override
                        public void handle(ActionEvent t) {
                            context2.clearRect(0, 0, animation.getWidth(), animation.getHeight());
                            final int nextIndex = rnd.nextInt(images.size());
                            Image kajak = images.get(nextIndex);
                            System.out.println("Draw image with index "+nextIndex);
                            int rndX = rnd.nextInt(xRange);
                            int rndY = rnd.nextInt(yRange);
                            context2.drawImage(kajak, rndX, rndY); // TODO location
                        }
                    },
                    new KeyValue[0]) // don't use binding
        );
        timeLine.playFromStart();

        root.getChildren().add(animation);

        Scene scene = new Scene(root, width, height);

        stage.setTitle("Moving Overlay Test");
        stage.setScene(scene);
        stage.show();
    }

    /**
     * The main() method is ignored in correctly deployed JavaFX application.
     * main() serves only as fallback in case the application can not be
     * launched through deployment artifacts, e.g., in IDEs with limited FX
     * support. NetBeans ignores main().
     *
     * @param args the command line arguments
     */
    public static void main(String[] args) {
        launch(args);
    }
}
This step itself throws up two new issues to be investigated:
- Use of data binding
- Use of ImageView together with a different layout
It might surprise that I mention the second point again, so I have do tell a bit more about the background:
In OpenPatrician the game view is largely static but there are some animations (people that walk around). In the JavaFX context each such animation would be a leaf in the scene graph, or the whole game view would be a single Canvas which needs to be updated in each render cycle. This code uses two Canvases. Both of the same size. Only in to top one I redraw the image each time. Using the a Canvas means, that the whole canvas has to be updated. Furthermore there is the possibility that part of the scene is not visible in the viewport.
Ein Gedanke zu „JavaFX animated overlay with Canvas“